DEPARTMENT OF SOFTWARE ENGINEERING(M.TECH)
YEAR/ SEM : 1/1
SUBJECT TITLE: Service Oriented Architecture Lab
1. Develop at least 5 components such as Order Processing, Payment Processing, etc., using .NET component technology.
2. Develop at least 5 components such as Order Processing, Payment Processing, etc., using EJB component technology.
3. Invoke .NET components as web services.
4. Invoke EJB components as web services.
5. Develop a Service Orchestration Engine (workflow) using WS-BPEL and implement service composition. For example, a business process for planning business travels will invoke several services. This process will invoke several airline companies (such as American Airlines, Delta Airlines etc.) to check the airfare price and buy at the lowest price.64
6. Develop a J2EE client to access a .NET web service.
7. Develop a .NET client to access a J2EE web service.
components using .NET
COMPONENT DEVELOPMENT USING .NET TECHNOLOGY
A component is a special type of executable built from a .NET project. In-Process Components are .NET components built as DLLs run within the process space of the host application and share memory and processor time with their host applications.
SOFTWARE REQUIREMENTS
Microsoft Visual Studio 2008 Version 9.0.21022.8 RTM
Microsoft .NET Framework Version 3.5
Installed Edition: Enterprise
PROCEDURE
I. Creating the Component
Follow these steps to build a .NET DLL component
1. Start Visual Studio .NET and open a new Class Library project. In the New Project dialog box, name the project.
2. Change the name of the class from Class1 to Component name (for eg TimeComp, InterestComp)
3. Enter the Component code into the new class module.
4. Compile this class as a DLL by clicking Build on the Debug menu or by using the Ctrl+Shift+B keystroke combination.
The DLL that results from the build command is placed into the \bin directory immediately below your .NET project directory. By default, the DLL has the same name as your component project.

II Creating the Application
Once the DLL project has been compiled, its services are available to any Windows Form .NET application. Follow these steps to create the client application:
1. Start Visual Studio .NET, select Windows Application as the new project type, and name the project.
2. Set the Name property of the default Windows Form(for eg frmConsumer, intrfrm)
3. Design the Form by placing controls and naming them.
4. You need to set a reference to the DLL so that this form will be able to consume the components services.
5. Do this by following the steps below.
6. From the Project menu, click Add Reference.

1. Click the Browse tab to locate the component DLL built.
Figure 1. The .NET tab in the Add Reference dialog box
Figure 2. Selecting a DLL reference
2. Select the .DLL file, click Open, and then click OK.

The Solution Explorer, as shown in Figure 3, now shows the component added as a reference in your application. What this means is that all of the classes, along with their properties, methods, and events, are now available to your consumer application.
Figure 3. Solution Explorer showing all current references
3. Enter the Application code.
4. Run the application by pressing F5 function key or Start Debugging from Debug Menu
TIME STAMP COMPONENT USING .NET
COMPONENT CODE
Public Class ServerTime
Private mdtTime As DateTime
ReadOnly Property TimeStamp() As String
Get
mdtTime = Now()
Return CStr(mdtTime)
End Get
End Property
End Class
APPLICATION CODE
Public Class TimeFrm
Private Sub btnGetServerTime_Click( _ ByVal sender As System.Object, _ ByVal e As System.EventArgs) _ Handles btnGetServerTime.Click
Dim st As New ServerTime.ServerTime
txtServerTime.Text = st.TimeStamp
End Sub
End Class
FORM DESIGNING
Label : Property : Text – Time Stamp Component
Button : Property: Name – btnGetServerTime
Text – Get Server Time
Text Box : Property: Name – txtServerTime
OUTPUT
II Creating the Application
Once the DLL project has been compiled, its services are available to any Windows Form .NET application. Follow these steps to create the client application:
1. Start Visual Studio .NET, select Windows Application as the new project type, and name the project.
2. Set the Name property of the default Windows Form(for eg frmConsumer, intrfrm)
3. Design the Form by placing controls and naming them.
4. You need to set a reference to the DLL so that this form will be able to consume the components services.
5. Do this by following the steps below.
6. From the Project menu, click Add Reference.
1. Click the Browse tab to locate the component DLL built.
Figure 1. The .NET tab in the Add Reference dialog box
Figure 2. Selecting a DLL reference
2. Select the .DLL file, click Open, and then click OK.
The Solution Explorer, as shown in Figure 3, now shows the component added as a reference in your application. What this means is that all of the classes, along with their properties, methods, and events, are now available to your consumer application.
Figure 3. Solution Explorer showing all current references
3. Enter the Application code.
4. Run the application by pressing F5 function key or Start Debugging from Debug Menu
TIME STAMP COMPONENT USING .NET
COMPONENT CODE
Public Class ServerTime
Private mdtTime As DateTime
ReadOnly Property TimeStamp() As String
Get
mdtTime = Now()
Return CStr(mdtTime)
End Get
End Property
End Class
APPLICATION CODE
Public Class TimeFrm
Private Sub btnGetServerTime_Click( _ ByVal sender As System.Object, _ ByVal e As System.EventArgs) _ Handles btnGetServerTime.Click
Dim st As New ServerTime.ServerTime
txtServerTime.Text = st.TimeStamp
End Sub
End Class
FORM DESIGNING
Label : Property : Text – Time Stamp Component
Button : Property: Name – btnGetServerTime
Text – Get Server Time
Text Box : Property: Name – txtServerTime
OUTPUT

INTEREST CALCULATION COMPONENT USING .NET
FORM DESIGNING

ORDER PROCESSING COMPONENT USING .NET

ADDING DATA SOURCE
1. Create the table in MS-Access with the following fields
MS-Access Database name : AddressBook.mdb Table name : tblContacts
2.Select Add New Data Source from Data menu
 3.Select Database and Click Next
4.Choose New Connection and clcik Browse to select the database you have created
3.Select Database and Click Next
4.Choose New Connection and clcik Browse to select the database you have created
Also Test the Connection by clicking Test Connection button
5.Check the box near the tblContacts and click Finish button

6.Database connection is added to our project and it can be seen by selecting Server Explorer form VIEW menu
7.Build and Execute the Project.
INTEREST CALCULATION COMPONENT USING .NET
FORM DESIGNING
ORDER PROCESSING COMPONENT USING .NET
ADDING DATA SOURCE
OUTPUT :

TEMPERATURE CONVERSION COMPONENT USING .NET

CURRENCY CONVERTER COMPONENT USING .NET

TEMPERATURE CONVERSION COMPONENT USING .NET
CURRENCY CONVERTER COMPONENT USING .NET
components using EJB
INVOKING COMPONENTS USING EJB COMPONENT TECHNOLOGY
To develop the following five components and to invoke them using EJB Component Technology.
· Payment Processing.
· Simple Interest.
· Conversion Of Temperatures.
· Currency Calculator.
SOFTWARE REQUIRED:
· Netbeans JDE 6.9.1
PROCEDURE:
Step 1: Open NETBEANS,choose File->NewProject.Select JavaEE and in Projects select EJBModule.
 Step 2: Click Next,enter ProjectName (EJBModule1) and location.Click Next.
Select GlassFish Server.Click Finish.
Step 3:Right click EJBModule1.Select New->SessionBean
Enter the EJBName(NewSessionBean).Enter the package name.
Step 4: Enable Session type as “stateless” and create interface as Remote.Click Finish.
In Package (ITrockers) two files are created as 1.NewSessionBean.java
2.NewSessionBeanRemote.java
 Step 5: In NewSessionBean.java include @WebService below @Stateless and include the corresponding WebService header as import javax.jws.WebService

Step 6: Enter the file functions with return values .copy the five function declarations in the NewSessionBeanRemote.java with the semicolon.
CODE:
package ITrockers;
import javax.ejb.Stateless;
import javax.jws.WebService;
@Stateless
@WebService
public class NewSessionBean implements NewSessionBeanRemote {
public int order_processing(int price,int qty)
{
return price*qty;
}
public double payment_processing(double m_p,double discount,double tax)
{
double c_p = m_p - discount;
double total_cost = c_p + tax;
return total_cost;
}
public int currency_conversion(int dollar)
{
return dollar*66;
}
public double simple_interest(double p,double n,double r)
{
return (p*n*r)/100;
}
public double temp_conversion(int celsius)
{
int fahrenheit;
fahrenheit=celsius*(9/5)+32 ;
return fahrenheit;
} }
Step 7:Copy the five function declarations in the NewSessionBeanRemote.java with the semicolon.
CODE:
package ITrockers;
import javax.ejb.Remote;
@Remote
public interface NewSessionBeanRemote {
public int order_processing(int price,int qty);
public double payment_processing(double m_p,double discount,double tax);
public int currency_conversion(int dollar);
public double simple_interest(double p,double n,double r);
public double temp_conversion(int celsius);
}
Step 8:Right click EJBModule1 and select Deploy.After deploy Run the EJBModule1.
Step 9:After running the module a WebService File will be created as NewSessionBean.
 Step 10:Right click NewSessionBean and select TestWebService.
Then see the output with wsdl and soap message.

CODE:
Invoke web services in .NET
SOFTWARE REQUIREMENTS:
· Microsoft Visual Studio 2008 version 9.0.21022.8 rtm
· Microsoft .NET Framework version 3.5
· Installed edition ,enterprise
PROCEDURE:
Use Visual studio 2005/2008/2010 to create the new web service project as showb below
1. Open Visual Web Developer.
 2. On the File menu, click New Web Site.
3. The New Web Site dialog box appears.
4. Under Visual Studio installed templates, click ASP.NET Web Service.
5. Click Browse.
6. Type the name TemperatureWebService.
SAMPLE CODE FOR CREATE WEBMETHOD
2. On the File menu, click New Web Site.
3. The New Web Site dialog box appears.
4. Under Visual Studio installed templates, click ASP.NET Web Service.
5. Click Browse.
6. Type the name TemperatureWebService.
SAMPLE CODE FOR CREATE WEBMETHOD
<WebMethod()> _
Public Function FahrenheitToCelsius(ByVal Fahrenheit As String) As String
Dim fahr
fahr = Trim(Replace(Fahrenheit, ",", "."))
If fahr = "" Or IsNumeric(fahr) = False Then Return "Error"
Return ((((fahr) - 32) / 9) * 5)
End Function
<WebMethod()> _
Public Function CelsiusToFahrenheit(ByVal Celsius As String) As String
Dim cel
cel = Trim(Replace(Celsius, ",", "."))
If cel = "" Or IsNumeric(cel) = False Then Return "Error"
Return ((((cel) * 9) / 5) + 32)
End Function
<WebMethod()> _
Public Function subtract(ByVal a As Integer, ByVal b As Integer) As Integer
Return a - b
End Function
End Class
7. Click Open.
 8. Visual Web Developer creates the new Web service and opens a new class named Service, which is the default Web service.
SOFTWARE REQUIREMENTS:
PROCEDURE:
Use Visual studio 2005/2008/2010 to create the new web service project as showb below
1. Open Visual Web Developer.
2. On the File menu, click New Web Site.
3. The New Web Site dialog box appears.
4. Under Visual Studio installed templates, click ASP.NET Web Service.
5. Click Browse.
6. Type the name TemperatureWebService.
SAMPLE CODE FOR CREATE WEBMETHOD
<WebMethod()> _
Public Function FahrenheitToCelsius(ByVal Fahrenheit As String) As String
Dim fahr
fahr = Trim(Replace(Fahrenheit, ",", "."))
If fahr = "" Or IsNumeric(fahr) = False Then Return "Error"
Return ((((fahr) - 32) / 9) * 5)
End Function
<WebMethod()> _
Public Function CelsiusToFahrenheit(ByVal Celsius As String) As String
Dim cel
cel = Trim(Replace(Celsius, ",", "."))
If cel = "" Or IsNumeric(cel) = False Then Return "Error"
Return ((((cel) * 9) / 5) + 32)
End Function
<WebMethod()> _
Public Function subtract(ByVal a As Integer, ByVal b As Integer) As Integer
Return a - b
End Function
End Class
7. Click Open.
8. Visual Web Developer creates the new Web service and opens a new class named Service, which is the default Web service.

STEP 4: COMPILE AND BUILD THE APPLICATION

INVOKING WEB SERVICE USING HTML or JSP or any WEBPAGES
Create a html page with your own template and output of web service link give to form action link
Ex
<form action='http://localhost:3124/Service1.asmx/WEIGHT'(LINK OF OUTPUT)
Create a html page with your own template and output of web service link give to form action link
Ex
<form action='http://localhost:3124/Service1.asmx/WEIGHT'(LINK OF OUTPUT)
WS-BPEL
SOFTWARE REQUIREMENTS:
· NetBeans version 6.0
PROCEDURE:
STEP 1:
Click NetBeans version 6.0->File->NewProject.
Choose Project Category as SOA and select BPEL Module.Click Next.

STEP 2: Give project name and location. Click Finish.
STEP 3: Right click Bpel Module->New->Bpel Process.
Specify the File Name and Project for the New BPEL Process and click Finish.

A New Bpel Process will be created in BPEL Module as follows.
STEP 4:ü From the Palette window drag and place the Receive, Reply and Assign Components and the components are renamed as Receive (Start), & Reply (End).
 STEP 5:
Right click BpelModule ->New->WSDL Document.
STEP 5:
Right click BpelModule ->New->WSDL Document.

Specify the File Name and Project for the newly created WSDL Document in the BPEL Module. Click Next.
STEP 6: Add the Input and Output with Element Type specification by clicking Add button. Click Finish.

STEP 7:
Create a Partner link either by dragging and dropping the Wsdl Document created or by selecting Partner link from the Palette window.

STEP 8:
Double click the start (Receive) component in the BPEL diagram , the Property Editor Window appears. Select Partner link and click create button.
A default Input Variable gets created. Click OK
STEP 9:
Double click the End Component ,specify the Partner link and click create button.
A default output variable gets created. Click OK
Partner link gets created for the Start and End component.
STEP 10:
Double click the Assign component in BPEL Process.

A link is made for the input, output variables and the operation to be performed.

STEP 11 : Now choose File->NewProject->SOA->Composite Application and click Next.

Specify the Project name and location for the newly created composite application and click Finish.
Composite application gets created.
STEP 12: Right click Composite application->Add JBI Module.

Select the BPEL Module and Add the Project JAR files.
STEP 13: Deploy the Composite Application.
STEP 14: Right click Test from Composite application and choose NewTestCase.

Specify the Testcase name and a New Test case gets created.
STEP 15 :Select the WSDL Document and click Next.
STEP 16 : Select the WSDL Operation to be tested.Click Finish.
 An Input file with default input variable gets created with an empty output file.
STEP 17: Give input,save and run the Test Case.
This is sample output of string cancat program.

Specify the File Name and Project for the newly created WSDL Document in the BPEL Module. Click Next.
STEP 6: Add the Input and Output with Element Type specification by clicking Add button. Click Finish.
STEP 7:
Create a Partner link either by dragging and dropping the Wsdl Document created or by selecting Partner link from the Palette window.
STEP 8:
Double click the start (Receive) component in the BPEL diagram , the Property Editor Window appears. Select Partner link and click create button.
A default Input Variable gets created. Click OK
STEP 9:
Double click the End Component ,specify the Partner link and click create button.
A default output variable gets created. Click OK
Partner link gets created for the Start and End component.
STEP 10:
Double click the Assign component in BPEL Process.
A link is made for the input, output variables and the operation to be performed.

STEP 11 : Now choose File->NewProject->SOA->Composite Application and click Next.
Specify the Project name and location for the newly created composite application and click Finish.
Composite application gets created.
STEP 12: Right click Composite application->Add JBI Module.
Select the BPEL Module and Add the Project JAR files.
STEP 13: Deploy the Composite Application.
STEP 14: Right click Test from Composite application and choose NewTestCase.
Specify the Testcase name and a New Test case gets created.
STEP 15 :Select the WSDL Document and click Next.
STEP 16 : Select the WSDL Operation to be tested.Click Finish.
An Input file with default input variable gets created with an empty output file.
STEP 17: Give input,save and run the Test Case.
This is sample output of string cancat program.
.NET client to access a J2EE web service
SOFTWARE REQUIREMENTS:
· Net Beans 6.9.1
· Visual Studio 2008
PROCEDURE:
STEP 1: Open NetBeans 6.9.1 ->New Project
New Project->Java Web->Web Application
Change the Project Location->Browse the Location->click Next->Finish
STEP 2: Right Click the Web application Created->new-> Web Service
Change the Web service name ->Add Package name ->Click Finish
STEP 3: A Default Java File is Created->Click the Design Tab-> Add Operation
Add the operation name->Add Parameters for the operation->change the Return Type ->
click OK
SQUARE OPERATION :

After the Design the Code is automatically generated ->Write the Implementation code for the operation created
@WebService()
public class NewWebService {
SQUARE :
@WebMethod(operationName = "Square")
public Integer Square(@WebParam(name = "a")
int a ) {
int square=a*a;//TODO write your implementation code here:
return square;
}
TRY DIFFERENT TYPES OF OPERATION
STEP 4: Right Click WebApplication ->Click Deploy
STEP 5 : Right Click->Web Services->Test Web Service
Click the WSDL File->Copy the URL
VISUAL STUDIO 2008 :
STEP 6:Click File->new->Web site
Select ASP.net Website ->Language Visual C#->Browse the File Location-> Click OK
STEP 7: Default.aspx->Click Design Tab
Create a Form With Text Box and Button As Shown

STEP 8: Right Click ->website ->Website ->ADD Web Reference

Paste the WSDL URL->Click Go->Click ADD Reference

STEP 9: In the Default.aspx.cs file add the implementation code as shown.
Code:
using System;
using System.Configuration;
using System.Data;
using System.Linq;
using System.Web;
using System.Web.Security;
using System.Web.UI;
using System.Web.UI.HtmlControls;
using System.Web.UI.WebControls;
using System.Web.UI.WebControls.WebParts;
using System.Xml.Linq;
public partial class _Default : System.Web.UI.Page
{
localhost.NewWebServiceService x = new localhost.NewWebServiceService();
protected void Page_Load(object sender, EventArgs e)
{
}
protected void TextBox4_TextChanged(object sender, EventArgs e)
{
}
protected void Button2_Click(object sender, EventArgs e)
{
int a = Int32.Parse(TextBox1.Text);
int square;
bool z;
x.Square(a, out square, out z);
TextBox2.Text = square.ToString();
}
protected void Button3_Click(object sender, EventArgs e)
{
int a = Int32.Parse(TextBox3.Text);
int b = Int32.Parse(TextBox4.Text);
int c;
bool z;
x.Addition(a, b, out c, out z);
TextBox5.Text = c.ToString();
}
}
STEP 10: Save the File->Run the Website created
New Project->Java Web->Web Application
Change the Project Location->Browse the Location->click Next->Finish
STEP 2: Right Click the Web application Created->new-> Web Service
Change the Web service name ->Add Package name ->Click Finish
STEP 3: A Default Java File is Created->Click the Design Tab-> Add Operation

Add the operation name->Add Parameters for the operation->change the Return Type ->
click OK
SQUARE OPERATION :
After the Design the Code is automatically generated ->Write the Implementation code for the operation created
@WebService()
public class NewWebService {
SQUARE :
@WebMethod(operationName = "Square")
public Integer Square(@WebParam(name = "a")
int a ) {
int square=a*a;//TODO write your implementation code here:
return square;
}
TRY DIFFERENT TYPES OF OPERATION
STEP 4: Right Click WebApplication ->Click Deploy
STEP 5 : Right Click->Web Services->Test Web Service
Click the WSDL File->Copy the URL
VISUAL STUDIO 2008 :
STEP 6:Click File->new->Web site
Select ASP.net Website ->Language Visual C#->Browse the File Location-> Click OK
STEP 7: Default.aspx->Click Design Tab
Create a Form With Text Box and Button As Shown
STEP 8: Right Click ->website ->Website ->ADD Web Reference
Paste the WSDL URL->Click Go->Click ADD Reference
STEP 9: In the Default.aspx.cs file add the implementation code as shown.
Code:
using System;
using System.Configuration;
using System.Data;
using System.Linq;
using System.Web;
using System.Web.Security;
using System.Web.UI;
using System.Web.UI.HtmlControls;
using System.Web.UI.WebControls;
using System.Web.UI.WebControls.WebParts;
using System.Xml.Linq;
public partial class _Default : System.Web.UI.Page
{
localhost.NewWebServiceService x = new localhost.NewWebServiceService();
protected void Page_Load(object sender, EventArgs e)
{
}
protected void TextBox4_TextChanged(object sender, EventArgs e)
{
}
protected void Button2_Click(object sender, EventArgs e)
{
int a = Int32.Parse(TextBox1.Text);
int square;
bool z;
x.Square(a, out square, out z);
TextBox2.Text = square.ToString();
}
protected void Button3_Click(object sender, EventArgs e)
{
int a = Int32.Parse(TextBox3.Text);
int b = Int32.Parse(TextBox4.Text);
int c;
bool z;
x.Addition(a, b, out c, out z);
TextBox5.Text = c.ToString();
}
}
STEP 10: Save the File->Run the Website created
J2EE client to access a .NET web service
J2EE Client access to .NET Web Service
SOFTWARE REQUIREMENTS:
· Netbeans JDE 6.9.1
PROCEDURE :
Step 1: Start Visual Basic 2008 -> New Website ->Click ASP.Net Web Service
->Change the File Location->6th exp\WebSite1->click OK

Step 2:
Include the Function in the Code Using Web Function( )
CODE :
Public Class Service
Inherits System.Web.Services.WebService
Default Method Created
<WebMethod()> _
Public Function HelloWorld() As String
Return "Hello World"
End Function
Total Price :
<WebMethod()> _
Public Function TotalPrice(ByVal Qty As Integer, ByVal Price As Integer) As Integer
Return "The Total Price"
Return Qty * Price
End Function
Farenheit to celsius :
<WebMethod()> _
Public Function ftoc(ByVal fahren As Double) As Double
Return "Farenheit"
Return ((fahren * 32) / 9 + 5)
End Function
Dollar Conversion :
<WebMethod()> _
Public Function DollarConversion(ByVal Rupee As Double) As Double
Return "Rupee Value"
Return Rupee * 66.5
End Function
End Class
Run the Service.vb File of the Website created ->copy the WSDL URL

Step 3:
Start-> Net beans JDE 6.9.1,
Go to File->New Project->Java Web ->Web Application->next
Change Project name and file location->next ->Finish
Step 4: Right click->Web Application->new->WebService Client

Step 5: Copy the URL (WSDL file) from the website (service Description) executed through visual Basic and paste in the WSDL URL

Click SetProxy->set the default Web Browser ->firefox->ok->finish
Step 6: Index.jsp->right click -> Webservice Client Resources->Call web service operation

Step 7 :Select the Service Soap for every function defined

The Code is generated automatically for every function.
Hello World:
<%-- start web service invocation --%><hr/>
<%
try {
org.tempuri.Service service = new org.tempuri.Service();
org.tempuri.ServiceSoap port = service.getServiceSoap();
// TODO process result here
java.lang.String result = port.helloWorld();
out.println("Result = "+result);
} catch (Exception ex) {
// TODO handle custom exceptions here
}
%>
<%-- end web service invocation --%><hr/>
Time:
<%-- start web service invocation --%><hr/>
<%
try {
org.tempuri.Service service = new org.tempuri.Service();
org.tempuri.ServiceSoap port = service.getServiceSoap();
// TODO initialize WS operation arguments here
java.lang.String a = "minute";
int b = 8;
// TODO process result here
int result = port.time(a, b);
out.println("Result = "+result);
} catch (Exception ex) {
// TODO handle custom exceptions here
}
%>
<%-- end web service invocation --%><hr/>
Total Price :
<%-- start web service invocation --%><hr/>
<%
try {
org.tempuri.Service service = new org.tempuri.Service();
org.tempuri.ServiceSoap port = service.getServiceSoap();
// TODO initialize WS operation arguments here
int qty = 8;
int price = 9;
// TODO process result here
int result = port.totalPrice(qty, price);
out.println("Result = "+result);
} catch (Exception ex) {
// TODO handle custom exceptions here
}
%>
<%-- end web service invocation --%><hr/>
Farenheit To Celsius :
<%-- start web service invocation --%><hr/>
<%
try {
org.tempuri.Service service = new org.tempuri.Service();
org.tempuri.ServiceSoap port = service.getServiceSoap();
// TODO initialize WS operation arguments here
double fahren = 78d;
// TODO process result here
double result = port.ftoc(fahren);
out.println("Result = "+result);
} catch (Exception ex) {
// TODO handle custom exceptions here
}
%>
<%-- end web service invocation --%><hr/>
Currency Conversion :
<%-- start web service invocation --%><hr/>
<%
try {
org.tempuri.Service service = new org.tempuri.Service();
org.tempuri.ServiceSoap port = service.getServiceSoap();
// TODO initialize WS operation arguments here
double rupee = 67d;
// TODO process result here
double result = port.dollarConversion(rupee);
out.println("Result = "+result);
} catch (Exception ex) {
// TODO handle custom exceptions here
}
%>
<%-- end web service invocation --%><hr/>
Step 8 : Richt click WebApplication 1->Deploy->Run and see the output
J2EE Client access to .NET Web Service
SOFTWARE REQUIREMENTS:
· Netbeans JDE 6.9.1
PROCEDURE :
Step 1: Start Visual Basic 2008 -> New Website ->Click ASP.Net Web Service
->Change the File Location->6th exp\WebSite1->click OK
Step 2:
Include the Function in the Code Using Web Function( )
CODE :
Public Class Service
Inherits System.Web.Services.WebService
Default Method Created
<WebMethod()> _
Public Function HelloWorld() As String
Return "Hello World"
End Function
Total Price :
<WebMethod()> _
Public Function TotalPrice(ByVal Qty As Integer, ByVal Price As Integer) As Integer
Return "The Total Price"
Return Qty * Price
End Function
Farenheit to celsius :
<WebMethod()> _
Public Function ftoc(ByVal fahren As Double) As Double
Return "Farenheit"
Return ((fahren * 32) / 9 + 5)
End Function
Dollar Conversion :
<WebMethod()> _
Public Function DollarConversion(ByVal Rupee As Double) As Double
Return "Rupee Value"
Return Rupee * 66.5
End Function
End Class
Run the Service.vb File of the Website created ->copy the WSDL URL
Step 3:
Start-> Net beans JDE 6.9.1,
Go to File->New Project->Java Web ->Web Application->next
Change Project name and file location->next ->Finish
Step 4: Right click->Web Application->new->WebService Client
Step 5: Copy the URL (WSDL file) from the website (service Description) executed through visual Basic and paste in the WSDL URL
Click SetProxy->set the default Web Browser ->firefox->ok->finish
Step 6: Index.jsp->right click -> Webservice Client Resources->Call web service operation
Step 7 :Select the Service Soap for every function defined
The Code is generated automatically for every function.
Hello World:
<%-- start web service invocation --%><hr/>
<%
try {
org.tempuri.Service service = new org.tempuri.Service();
org.tempuri.ServiceSoap port = service.getServiceSoap();
// TODO process result here
java.lang.String result = port.helloWorld();
out.println("Result = "+result);
} catch (Exception ex) {
// TODO handle custom exceptions here
}
%>
<%-- end web service invocation --%><hr/>
Time:
<%-- start web service invocation --%><hr/>
<%
try {
org.tempuri.Service service = new org.tempuri.Service();
org.tempuri.ServiceSoap port = service.getServiceSoap();
// TODO initialize WS operation arguments here
java.lang.String a = "minute";
int b = 8;
// TODO process result here
int result = port.time(a, b);
out.println("Result = "+result);
} catch (Exception ex) {
// TODO handle custom exceptions here
}
%>
<%-- end web service invocation --%><hr/>
Total Price :
<%-- start web service invocation --%><hr/>
<%
try {
org.tempuri.Service service = new org.tempuri.Service();
org.tempuri.ServiceSoap port = service.getServiceSoap();
// TODO initialize WS operation arguments here
int qty = 8;
int price = 9;
// TODO process result here
int result = port.totalPrice(qty, price);
out.println("Result = "+result);
} catch (Exception ex) {
// TODO handle custom exceptions here
}
%>
<%-- end web service invocation --%><hr/>
Farenheit To Celsius :
<%-- start web service invocation --%><hr/>
<%
try {
org.tempuri.Service service = new org.tempuri.Service();
org.tempuri.ServiceSoap port = service.getServiceSoap();
// TODO initialize WS operation arguments here
double fahren = 78d;
// TODO process result here
double result = port.ftoc(fahren);
out.println("Result = "+result);
} catch (Exception ex) {
// TODO handle custom exceptions here
}
%>
<%-- end web service invocation --%><hr/>
Currency Conversion :
<%-- start web service invocation --%><hr/>
<%
try {
org.tempuri.Service service = new org.tempuri.Service();
org.tempuri.ServiceSoap port = service.getServiceSoap();
// TODO initialize WS operation arguments here
double rupee = 67d;
// TODO process result here
double result = port.dollarConversion(rupee);
out.println("Result = "+result);
} catch (Exception ex) {
// TODO handle custom exceptions here
}
%>
<%-- end web service invocation --%><hr/>
Step 8 : Richt click WebApplication 1->Deploy->Run and see the output
Invoke web services in EJB
INVOKING OF WEB SERVICE IN EJB
Aim:
To create a web service for adding few numbers using NetBeans and write client side code to invoke the web service.
Algorithm:
- Using the Netbeans API create a project of the type web application.
- Create a web service in the project.
- Click on the Design tab and design the prototype of the web service.
- Click on source tab and modify the application logic of the web service.
- Save the project.
- Right click on the project and click on deploy and undeploy.
- Then test the web service.
- Create another web application project and create a jsp file.
- Right click on project and click on create web service client.
- Browse and choose the web service created i.e wsdl url
- Drag and drop the web service reference to the source code window.
- Then pass the appropriate parameters to the web service client and invoke the web service.
STEPS TO CREATE CLIENT SIDE PROJECT:
1.create the new project as above and give the name as addclient.
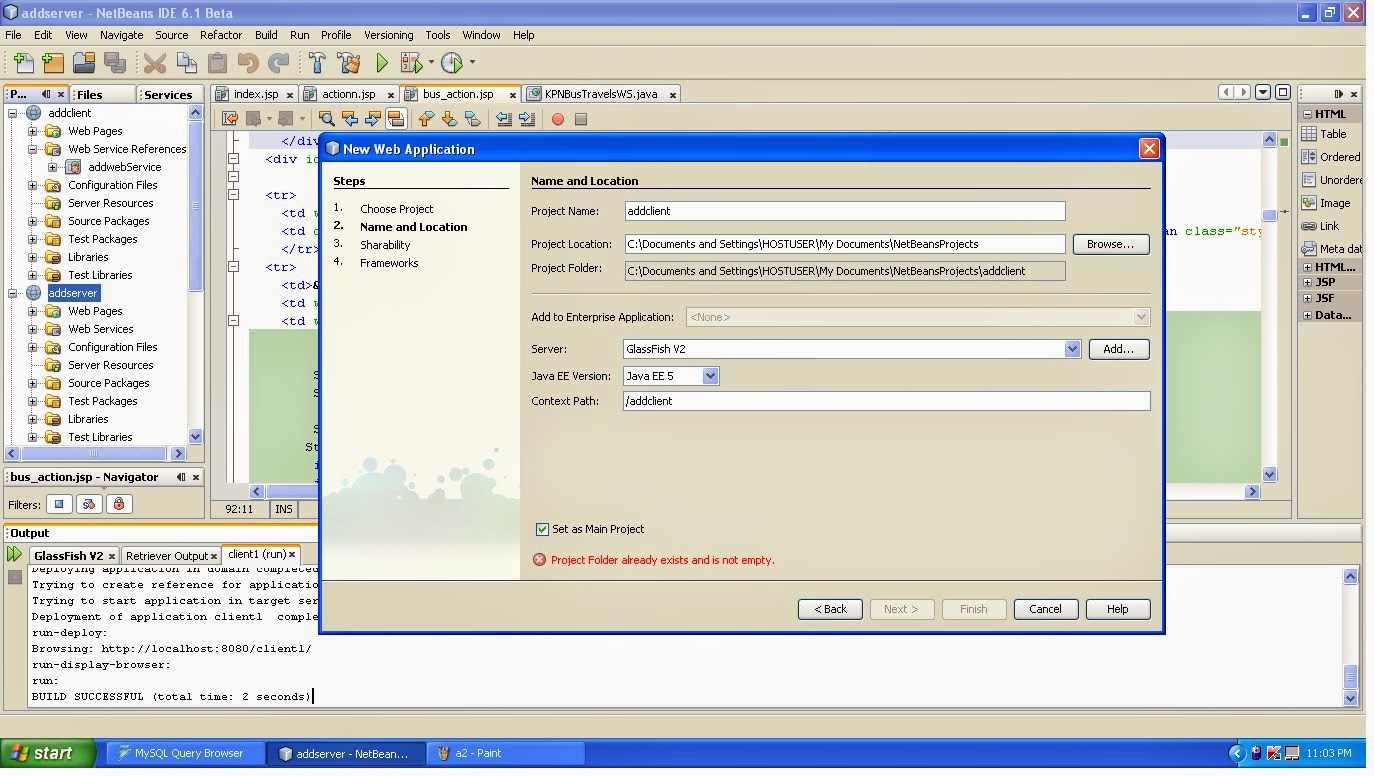

3.Then browse and choose the addweb wsdl file

4.Then choose the following and add the source code in index.jsp and save it.

Index.jsp source code
<%@page contentType="text/html" pageEncoding="UTF-8"%>
<!DOCTYPE HTML PUBLIC "-//W3C//DTD HTML 4.01 Transitional//EN"
"http://www.w3.org/TR/html4/loose.dtd">
<html>
<head>
<meta http-equiv="Content-Type" content="text/html; charset=UTF-8">
<title>JSP Page</title>
</head>
<body>
<h1>Hello World!</h1>
<form name="" action="http://localhost:1100/Service1.asmx" method="post">
Enter 1st No:<input name="fst" type="text" /><br/>
Enter 2nd No:<input name="snd" type="text" /><br/>
<input name="ok" type="submit" value="Add" />
</form>
</body>
</html>
OR
TRY IN HTML PAGE ITSELF
<form name="" action="http://localhost:1100/Service1.asmx" method="post">
INVOKING OF WEB SERVICE IN EJB
Aim:
To create a web service for adding few numbers using NetBeans and write client side code to invoke the web service.
Algorithm:
- Using the Netbeans API create a project of the type web application.
- Create a web service in the project.
- Click on the Design tab and design the prototype of the web service.
- Click on source tab and modify the application logic of the web service.
- Save the project.
- Right click on the project and click on deploy and undeploy.
- Then test the web service.
- Create another web application project and create a jsp file.
- Right click on project and click on create web service client.
- Browse and choose the web service created i.e wsdl url
- Drag and drop the web service reference to the source code window.
- Then pass the appropriate parameters to the web service client and invoke the web service.
STEPS TO CREATE CLIENT SIDE PROJECT:
1.create the new project as above and give the name as addclient.
3.Then browse and choose the addweb wsdl file
4.Then choose the following and add the source code in index.jsp and save it.
Index.jsp source code
<%@page contentType="text/html" pageEncoding="UTF-8"%>
<!DOCTYPE HTML PUBLIC "-//W3C//DTD HTML 4.01 Transitional//EN"
"http://www.w3.org/TR/html4/loose.dtd">
<html>
<head>
<meta http-equiv="Content-Type" content="text/html; charset=UTF-8">
<title>JSP Page</title>
</head>
<body>
<h1>Hello World!</h1>
<form name="" action="http://localhost:1100/Service1.asmx" method="post">
Enter 1st No:<input name="fst" type="text" /><br/>
Enter 2nd No:<input name="snd" type="text" /><br/>
<input name="ok" type="submit" value="Add" />
</form>
</body>
</html>
OR
TRY IN HTML PAGE ITSELF
<form name="" action="http://localhost:1100/Service1.asmx" method="post">


0 comments:
Post a Comment